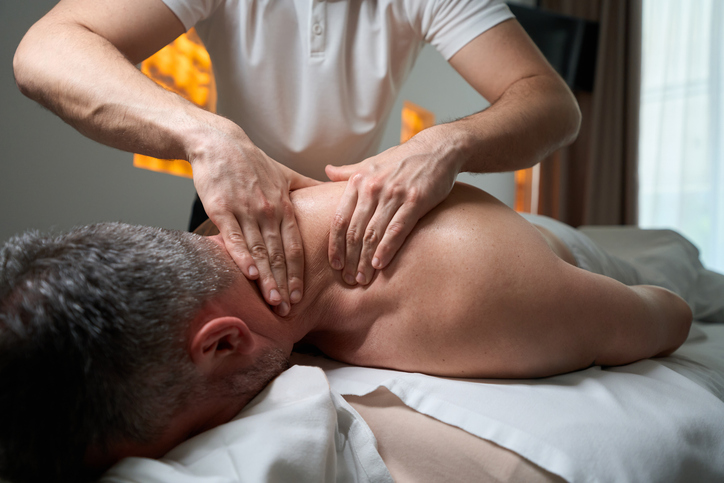
![]() | |||||||||||||||||||||||||||||||||||||||||||
|
|
Deep Tissue Massage By Art Riggs
The previous two articles have progressed from proper use of the tools of deep tissue massage to specific intentional stroke strategies to increase effectiveness in your work (February/March 2005, page 38; April/May 2005, page 60). One of the major tenets of the previous articles is the importance of stretching tissue instead of simply compressing or kneading it — remember the importance of not using too much lubrication so you are able to grab and stretch tissue rather than just sliding over it. From the first article, you should have a full range of tools from fingers, knuckles, fists, forearms, and elbows. From the second article, you should be working with precise intentions and goals behind each stroke. With the positioning options presented here, you should now feel free to creatively combine both tools and stroke strategies to suit your needs. Basic Principles Much of the everyday pain and dysfunction clients report occur at the end range of motion rather than in a neutral position. Working to lengthen muscles near the relaxed and comfortable end range can extend the limits of restricted motion, thus enabling more freedom of movement. One must be cautious, however, to not over-emphasize this principle. If the muscle is put on too much of a stretch (muscles can be more sensitive to intense work when stretched), it will be difficult to sink into the tissue. Also, if a joint is extended, flexed, or rotated too intensely, the muscles stabilizing the joint will contract to protect the joint. Move slowly and position the body so that muscles and joints are near their comfortable end range, and then slowly extend the limits of the stretch by working in the direction of lengthening. These principles are useful on virtually any muscle group in the body, and your clients will immediately notice the clarity of intention and effectiveness of the work. Remember, this work does not need to be intense or create discomfort for your clients. Even if you are giving a nurturing relaxation massage, the precision of your strokes will be appreciated and make your work more fun. Let’s begin by demonstrating these principles with a fairly simple example: the arms.
Creating Increased Mobility in the Forearm and Wrist
Often, the inflexibility of the forearm is located in the muscles that control the rotation of the radius around the ulna. The pronator teres and supinator muscles are the most important, but superficial fascial restrictions and tightness anywhere from the elbow to the distal forearm and wrist can also be a factor. As in the previous example, the key to stretching shortened tissue lies in manipulation of the forearm and wrist to stretch the tissue while working. By supinating the wrist and externally rotating the forearm as in Figure 2, the pronator teres is stretched and given the cue to lengthen, thus enabling better rotational mobility. Conversely, to provide increased pronation, the same principle would be applied in the extensor compartment of the forearm by rotating the forearm and wrist into pronation to stretch the supinator muscle while working. Working on the Quadratus Lumborum
By positioning the top leg slightly posterior and reaching inferior (it may be necessary to support the knee with a pillow), the right ilium is pulled down to stretch the quadratus. At the same time, the arm is abducted above the head to pull the rib cage up. The left leg is flexed at the hip with the knee bent to provide rotational stability in the pelvis and spine. Notice how much more length is afforded in this position than in a normal, knees-bent side-lying position. Work proximal and distal attachments and the belly of the quadratus. Although a soft fist, as shown in Figure 3, is useful to stretch superficial tissue, the muscle belly of the quadratus lumborum requires precise work. Using a scooping motion with the fingers will offer the most comfortable and effective release as you engage deeper tissue.
If time constraints prevent utilization of the side-lying strategy, moving the legs to one side will stretch the contralateral side. Again, fingers, or possibly knuckles, will enable the most precise work, as shown in Figure 4. Always be cautious to work at an oblique angle around the 12th rib and the kidneys. Freeing the Shoulder Girdle Mobilizing the Scapula
The forearm and fist are useful tools to release broad fascial restrictions, while fingers or knuckles are useful for working with the teres muscles or specific fibrosed areas. In Figure 5, notice how the left hand is externally rotating the humerus and leveraging the scapula posterior. At the same time, the elbow is an ideal tool to work anywhere along the lateral border of the scapula, as shown in Figure 6. Work slowly, and wait for the melt of tissue. This does not need to be intense or painful, and your clients will immediately notice the improvement in shoulder mobility and the ability of the shoulders to fall back.
Figures 7 and 8 exemplify the importance of a clear understanding of the mechanics of scapular movement to plan your positional strategies. Many people just visualize the rhomboids as one muscle that pulls the scapula toward the midline, while in reality, the upper and lower fibers can have very different angles of force. In addition to sliding up or down, or lateral or medial, the scapula must be able to rotate clockwise or counterclockwise. By abducting the right arm above the head, the scapula is rotated in a counterclockwise direction, which stretches the lower fibers of the rhomboids and allows them to release while being addressed. In this position, it will not be as effective to work on the upper rhomboids because they will be bunched into a shortened position and will not have a cue to lengthen. By adducting the arm down to the side in the second example, the opposite movement is accomplished as the scapula rotates clockwise and stretches the upper fibers and the trapezius. Using the knuckles, fist, or elbow with either cross fiber strokes or to lengthen in the direction you want the stretch will be useful strategies. Freeing the Humerous from Scapular Restrictions Working in the anterior plane offers freedom of movement in abduction, adduction, and rotation. Most restrictions will manifest themselves with the arm in abduction, so it is necessary to position the arm near the end rage of restriction to improve mobility.
Notice in Figure 9 the opposite hand is stabilizing the shoulder so that the internal rotational force applied to the humerus is focused at the glenoid fossa rather than in elevating the shoulder. Test the restriction to see where tight tissue prevents internal rotation. Work on either the anterior or posterior deltoid, corocobrachialis, the teres minor, or subscapularis at the medial border of the scapula. You certainly may access the posterior muscles of the rotator cuff, which are external rotators of the humerus and would restrict internal rotation, but the prone position affords better access to the rotator cuff.
Externally rotating the arm in an abducted position enables a stretch of the pectoralis muscles and fascia, both teres muscles (with increased stretch on the teres major since it is an internal rotator), and clarification of the border between the pectoralis major and the anterior deltoid. Abducting and externally rotating the arm above the shoulder enables an excellent stretch of the pectoralis major (an internal rotator and adductor of the humerus) utilizing the fist or forearm, but this position would also provide excellent access to the teres and the subscapularis muscles. Notice, the arrows indicate you may either traction (distract) or compress the shoulder joint while rotating the humerus. Many classes only demonstrate tractioning joints, but compressing any joint may also slacken tight ligaments and allow more mobility while you are working. Experiment with each client to determine which works best.
This last photo demonstrates the effectiveness of separating muscle compartments as you gently roll the anterior deltoid away from the pectoralis. Of course, the lymph nodes and nerve pathways in the axilla prevent work in that area.
The Posterior Shoulder and Rotator Cuff Although broad superficial strokes with the forearm or fist may be necessary to prepare the area for more detailed work, using the fingers or knuckles will offer the most effective treatment for specific areas of tightness in the muscles or the insertion of tendons on the humerus. Work extremely slowly, and wait for the melt of tissue using strokes that move in the direction of lengthening, but you may also soften fibrous tendons by rolling them between your fingers.
After you have freed the area (it may take several sessions), it is possible to work with the flexibility of positioning shown in this figure. By weaving your left hand under the wrist and then grasping the posterior aspect of the humerus, any number of positional stretches are available. In addition to internally or externally rotating the humerus or abducting or adducting while you are working, you may also traction the shoulder to decompress the joint or may compress the joint if that enables more freedom of movement. This enables you to make the small adjustments in order to always be working in a comfortable position near the end range of motion to increase flexibility. Positioning the Lower Body for Increased Mobility
Hamstrings are rarely uniformly short and tight throughout their entire length. Depending on the activity your client is engaged in, the hamstrings can be short and fibrosed in either the proximal or distal fibers (can you visualize how differently the hamstrings would function in skateboarding, where the leg is pushing with the knee relatively straight, compared to bicycling?). The first option is useful in treating the hamstrings near their pelvic attachments. Although you may flex the hip with your non-working hand, it is also useful to involve your client by having her grab her knee and pull it to her chest while using anchor and stretch strokes demonstrated in the previous article. Although the distal fibers will not be stretched in this position because of the flexed knee, it is a great strategy to work both the tendinous origins at the ischeal tuberosity and the proximal muscle belly. It also affords a chance to work on hip tracking by balancing the lateral and medial strains. Often, imbalances cause the hip to flex in a figure-eight pattern rather than straight forward and back. Notice where fibrosed tissue imposes rotational stress that impedes proper motion. Ask your client to pull her leg straight toward her chest while anchoring on tight areas with your knuckles, fists, or forearms/elbows.
Some clients such as bicyclists will be tighter in the distal fibers of the hamstrings and behind the knee. Of course it is useful to stretch the entire hamstrings, but the more flexible components often accommodate the stretch, while fibrosed areas can remain tight. By grabbing the hamstrings in tight areas near the knee and anchoring in a proximal direction while slowly extending the knee to stretch tissue, you will localize the stretch at the precise area of tightness. Anchor the tissue with your thumbs, and lean back or elevate your body to extend the knee. Be sure to notice if there are rotational strains on the knee and counter those strains to help the knee track straight.
Working with the Quadriceps
Remember, the rectus femoris is the only quadriceps muscle to cross the hip joint, and moving the hip further into extension will place it on a better stretch. Unfortunately, lying in the supine position, it is impossible to stretch the hip beyond the neutral position. By having your client slide down to the end of the table, it is possible to focus the stretch on the rectus femoris by extending the leg past neutral hip extension. Take care to make sure your client’s low back is able to tolerate this position, and always make sure the opposite leg is flexed toward the chest to keep the pelvis and spine in a neutral position. Use pillows to support the upper body and head. Precise work with the fingers will be effective near the attachment of the rectus femoris at the anterior inferior iliac spine, but clients seem to always love the broad lengthening strokes of the forearm on the belly of the quadriceps. This is also an excellent stretch of the psoas muscle, but the extra hip extension may stretch the abdomen so much that actual access to the psoas is difficult.
Releasing the Rotators
Flexing the hip and having your client’s top leg rotate internally is also an effective position to work on the rotators, and although it doesn’t offer the ability to stretch the muscles to end range, there is no strain on the knee and you will have the availability of both hands for working. Again, using a tool with a small surface area such as the fingers or knuckles will enable you to sink beneath the gluteals to work on the deeper rotators as shown in Figure 21. *** Working with proper biomechanics and the appropriate tools, having precision and clarity in your stroke intention, and utilizing creative positioning strategies to release tension will all contribute to a more rewarding and successful bodywork practice. I hope this trilogy has provided useful information that enables you to work with more ease and effectiveness and, most important, stimulated your thinking about ways to express your individuality through massage work. It is exciting to see the evolution of respect for massage and bodywork in the last few years to a valued health alternative, whether for general relaxation and stress relief or for clinical therapy for musculo-skeletal problems. In order to stay fresh and enthusiastic in our work, we all need to continue to grow and refine our skills, and it is wonderful there are so many excellent workshops and specialized disciplines now available. However, I would like to end this series with a reminder that the most sophisticated techniques are not a substitute for a refined touch that can only be transmitted through our hands. Cultivating these skills is a life-long process that is our primary way to connect with our clients and communicate our care for them. No other aspect of our work defines us as therapists as the subjective feel of a sensitive and powerful and nurturing touch. Art Riggs is a Certified Advanced Rolfer who practices in the San Francisco Bay area and teaches at the San Francisco School of Massage. He is the author of Deep Tissue Massage: A Visual Guide to Techniques and the seven-volume accompanying video series. Visit his website at www.deeptissuemassagemanual.com.
Share your thoughts! Click here to send a letter to the editor and let us know what you think. Your letter may be used in an upcoming issue of Massage & Bodywork magazine.
Please close window after reading. |
||||||||||||||||||||||||||||||||||||||||||
| ©2003 Associated Bodywork & Massage Professionals. All rights reserved. No portion of this website may be reproduced, stored in a retrieval system, or transmitted in any form by any means, electronic, mechanical, photocopying, recording, or otherwise, without prior written permission from ABMP. |